Quick start
This walkthrough takes you from a fresh install to sending a real invoice to a client. No coding required. If you're brand new to Easy Invoice, do every step below in order.
Stuck on something? Each step links to a deeper reference page.
Before you start
You should already have:
- WordPress 5.6+ running (any host, any theme).
- The Easy Invoice plugin installed and activated. (Installation guide)
- Optionally, Easy Invoice Pro activated with a license key if you bought it.
When you activate Easy Invoice for the first time, a new Easy Invoice menu appears in your WordPress sidebar with a green dot icon.
1. Company information
Open Easy Invoice → Settings → Company Information.
Fill in:
| Field | Why |
|---|---|
| Company Name | Printed on every invoice header |
| Where client replies go | |
| Phone Number | Optional contact info on invoices |
| Address | Required on invoices in most countries |
| Tax ID / VAT Number | Required in EU, Canada, Australia, etc. |
| Company Logo | Upload from Media Library — appears top-left on the PDF |
Click Save Changes.
📖 Full Company settings reference
2. Currency & numbering
Open Easy Invoice → Settings → Currency and set:
- Currency (USD / EUR / GBP / INR / NPR / 150+ options)
- Symbol Position (Left, Right, or with space)
- Thousands Separator + Decimal Separator (
1,234.56vs1.234,56) - Decimal Places (usually
2)
Then open Easy Invoice → Settings → Invoice and set:
- Invoice Prefix — your invoice number prefix (e.g.
INV-,2026-,EIIN_) - Next Invoice Number — typically
1(or your next number if migrating from another system)
📖 Currency settings · Invoice numbering
3. Tax (if applicable)
Open Easy Invoice → Settings → Tax.
- Enable Tax — tick if you charge VAT/GST/sales tax
- How do you enter tax? — usually
exclusive(price + tax) for B2B;inclusive(price already includes tax) for B2C in the EU - Default Tax Rate (%) — your country's standard rate (US: usually 0 here, US sales tax varies by state — set per invoice)
- Tax Name —
VAT,GST,Sales Tax,IVA, etc.
4. Email basics
Open Easy Invoice → Settings → Email → General.
- From Name — your business name (
Acme Co., notWordPress) - From Email Address — a real address on your domain (
[email protected]) - Click Send Test Email to your own address and confirm it arrives not in spam
If the test fails or lands in spam → install WP Mail SMTP or Fluent SMTP and connect a transactional service (SendGrid, Mailgun, Amazon SES). Then re-test.
5. Connect one payment gateway
You need at least one gateway so the Pay Now button works.
Free option — PayPal
- Open Easy Invoice → Settings → Payment.
- Find the PayPal row, tick Enable.
- Paste your PayPal business email, set Mode to
Live. - Save.
Pro option — Stripe (cards, Apple/Google Pay)
- Grab your keys from Stripe Dashboard → Developers → API Keys.
- Open Easy Invoice → Settings → Payment, tick Enable on Stripe.
- Paste Publishable Key + Secret Key.
- Add a webhook in Stripe (
yoursite.com/wp-admin/admin-ajax.php?action=easy_invoice_stripe_webhook) and paste the Webhook Secret back into Easy Invoice.
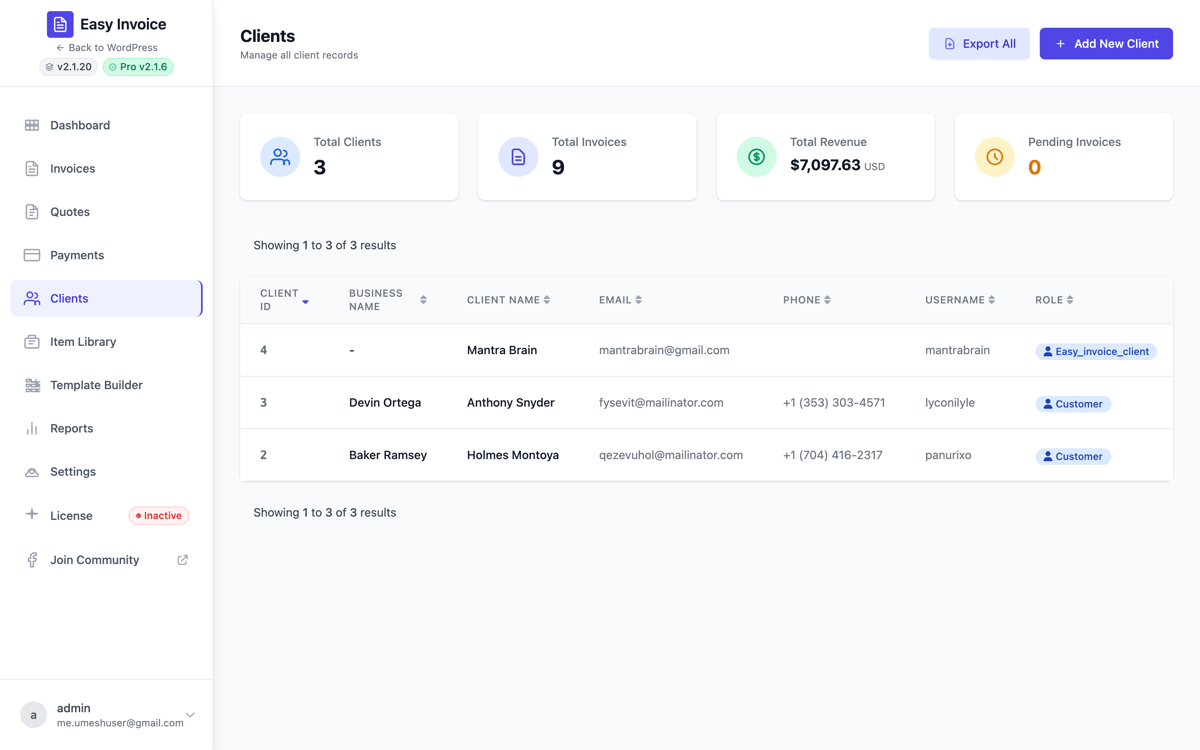
6. Create your first Client
Open Easy Invoice → All Clients → Add New Client.
Fill at minimum:
- First name + Last name (or Business name)
- Billing email (this is who'll receive the invoice email)
- Billing address
Click Add Client.
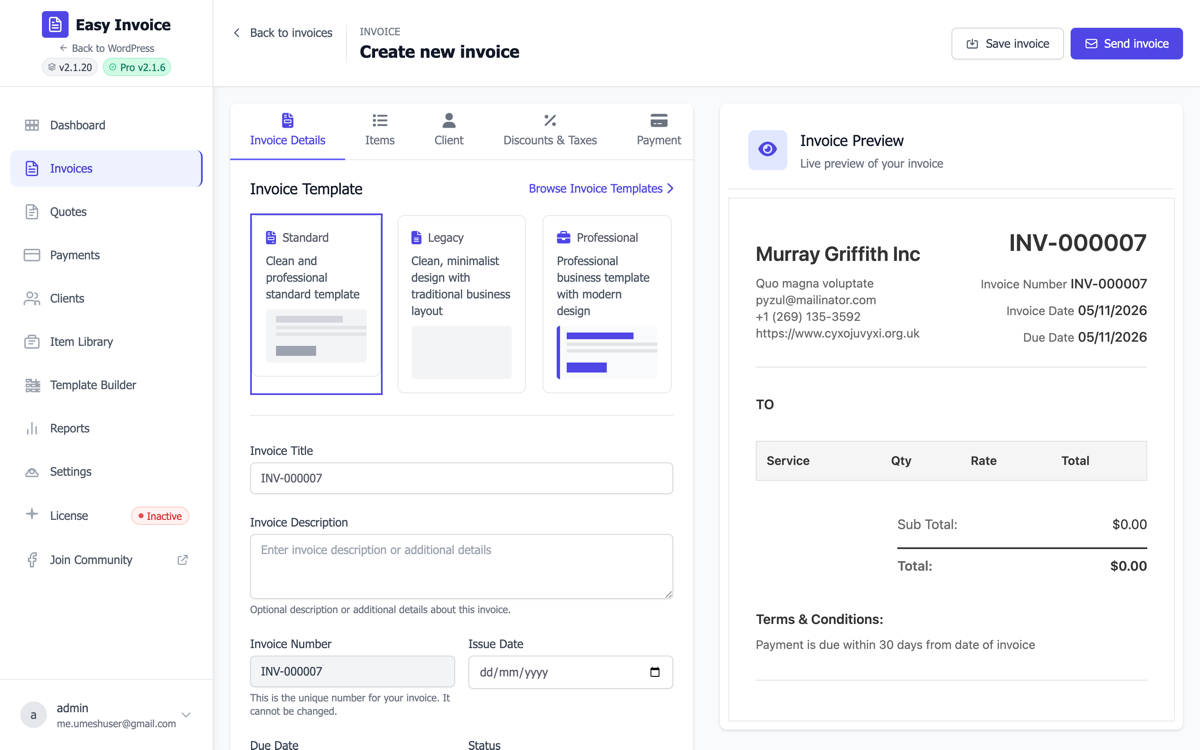
7. Create your first Invoice
Open Easy Invoice → Add New Invoice.
- Invoice Details tab: Type a title ("First test invoice"). Issue Date = today. Due Date = +14 days. Status = Available.
- Items tab: Click Add Item. Title:
Test product. Quantity:1. Price:100. Taxable: untick (for now). - Client tab: Pick the client you just created.
- Discounts & Taxes tab: Skip — leave as defaults.
- Payment tab: Confirm your enabled gateways are ticked.
- Click Publish.
8. Send it & test the Pay Now button
On the saved invoice page, click Send Email. The Invoice Available email goes to the client.
Now open the public invoice URL (from the green box at the top of the builder). You'll see your logo, the line items, the total, and a Pay Now button.
Click Pay Now — you should be sent to PayPal / Stripe / your gateway. Use a sandbox key and a test card to confirm the round-trip works.
When the payment clears, the invoice flips to Paid automatically, and a Payment Received email goes out.
You're live! What's next?
| Want to | Read |
|---|---|
| Send a quote before you invoice | Quotes guide |
| Personalize the emails | Email reference |
| Look up any specific setting | Settings reference |
| Bill clients monthly automatically PRO | Recurring invoices |
| Let clients log in & see their history PRO | Client portal |
| Add a custom PDF layout PRO | Pro features → Template Builder |